Blogroll

Monday, April 30, 2012

Tres Leches Cake

I wish I could follow the title of this post with a bunch of little hearts because I love this cake so much. Something about a cake soaked in a mixture that contains 3 types of milks (Tres Leches), sweetened condensed milk (which I could each straight up with a spoon, YUM!), evaporated milk (love it in my tea when I have it around), and heavy cream, just does something for me.

With Cinco De Mayo just around the corner, I thought I'd share this delicious cake with you.

Yum!


Tres Leches Cake
~serves 12~


Ingredients:
For the Tres Leches Mixture:
14 oz. can sweetened condensed milk
12 oz. can evaporated milk
1 c. heavy cream
1 t. vanilla extract
For the Cake
2 c. all-purpose flour
2 t. baking powder
1 t. salt
1/2 t. ground cinnamon
1/4 t. freshly grated nutmeg
8 T. (1 stick) unsalted butter
1 c. 2% milk
4 large eggs, at room temperature
2 c. sugar
2 t. vanilla extract
For the whipped cream topping
1 c. heavy cream
3 T. corn syrup
1 t. vanilla extract

Instructions:
1. For the Tres Leches mixture: Place the sweetened condensed milk into a large microwave safe bowl and cover tightly with plastic wrap. Microwave on low power (I chose 30% power) stirring and replacing the plastic wrap every 3-5 minutes, until the milk thickens and darkens slightly, 9-15 minutes total. (you are kind of making dulce de leche.) Whisk in the evaporated milk, 1 c. heavy cream and 1 t. vanilla extract. Cover and set aside, cool to room temperature.

2. Make the cake: Grease and flour a 13x9 inch baking dish. Adjust oven rack to middle position and preheat to 325 degrees. Whisk together flour, baking powder, salt, cinnamon and nutmeg. Heat butter and milk together in a small saucepan over low heat until the butter melts, set aside to cool slighlty while preparing the cake.

3. In the bowl of a stand mixer, add eggs. Beat at medium speed for about 30 second. Slowly add in the sugar. Increase the heat to medium high and beat until very thick and glossy, 5-7 minutes. Reduce speed to low and slowly add the butter/milk mixture and vanilla. Add the flour mixture in three additions, scraping down the sides of the mixing bowl as necessary. Then mix at medium speed for 30 seconds to fully incorporate. Pour batter into prepared pan and bake until a toothpick inserted into the center comes out clean, about 30-35 minutes. Transfer cake to a wire rack and let cool for 10 minutes.

4. Using a skewer, poke holes all over the cake at 1/2 inch intervals. Slowly pour the tres leches mixture all over the cake. Let sit at room temperature 15 minutes, then refrigerate for at least 3 hours prior to frosting the cake.

5. Remove the cake from the refrigerator 30 minutes before serving. Beat the remaining 1 c. heavy cream, corn syrup and 1 t. vanilla to soft peaks. Spread evenly over cake. (Cake can be assembled up to 3 days ahead of when you want to serve it.


Recipe Source: Adapted slightly from Cook's Country Magazine.

Flour Tortillas

Do you ever just have the desire to open up a package of supermarket tortillas and eat one straight outta the bag?

Of course you don't.

Because they don't taste very good.

When I was growing up I was lucky enough to have a mom that made tortillas from scratch whenever we had soft tacos. They were soft and flavorful with a distinct floury texture that supermarket tortillas just can't even begin to match. These were something of a kid-comfort food for me. I still remember when I was in kindergarten and we were asked to draw pictures of our favorite foods, I drew a yellowish circle, representing my beloved tortillas and I can still remember getting my paper back with a question mark next to my drawing because my teacher couldn't make out what I drew. (Ha!) I loved to eat them fresh with butter and I even recall a time or two requesting she make them when I was sick and didn't have much of an appetite. I wonder if tortillas were even widely available in supermarkets when I was growing up (in the 80's), because it almost seems strange to me in retrospect that my mom always made them from scratch.

But I am really glad that my childhood experience enlightened me on the simple pleasure of eating homemade flour tortillas. After I was married I was eager to share this experience with my new family and begin making my own homemade tortillas.

If you are the least bit intimidated by the thought of making these, don't be. This is literally the easiest dough you can work with. It is so forgiving, when it comes to the process of rolling out the tortillas into rounds. The only thing your may have trouble with might be making perfect circles. But no worries, the rustic appearance just means everyone will see how amazing you are for making your own homemade flour tortillas.


Flour Tortillas
~makes about 14-16~

Note* When stacking the rolled tortillas on a plate prior to cooking, be sure to sprinkle flour between the layers,(then using your hand gently rub the flour to spread it into a thin even layer) to prevent the tortillas from sticking to each other when you go to cook them.

Ingredients:
4 c. unbleached all-purpose flour
1 1/2 t. baking powder
1 t. salt
6 T. vegetable shortening
luke warm water
vegetable oil

Instructions:
1. In a large bowl, combine flour, baking powder and salt. Add shortening and using your fingers, rub the shortening into the flour mixture until it resembles a coarse meal. Add in water, a little at a time stirring after each addition until the dough comes together. (I used a little more than a cup of water.)

2. Briefly knead the dough until it comes together in a firm ball. Pinch off pieces of dough in the palm of your hand and roll into balls about 2 inches in diameter. Place dough balls on a plate and cover with a clean kitchen towel.

3. Roll out tortillas: On a floured surface, place a dough ball and flatten into a disk using the palm of your hand. Roll into a round, 8-10 inches in diameter. (Sprinkling with flour and flouring the rolling pin as needed to prevent sticking.) Place rolled tortilla on a plate and cover with a clean kitchen towel. Repeat with remaining balls of dough. Stack the rolled tortillas on top of each other sprinkling a little flour between the layers of tortillas (then using your hand gently rub the flour to spread it into a thin even layer) to prevent them from sticking to each other. 

4. Heat 1/2 t. vegetable oil in a large nonstick skillet over medium high heat until the oil just begins to smoke. Using paper towel, carefully wipe the oil out of the skillet (a very thin layer should be left behind). Add a tortilla and cook on the first side, until bubbles appear evenly over the surface of the tortilla and it is just browning on the underside, about a minute. Flip the tortilla and cook on the second side, about another minute. Tortilla should puff when you flip it. Remove to a plate and cover with a clean kitchen towel. Repeat with remaining tortillas. (You won't need to add any more oil.) 

5. Enjoy. 


Saturday, April 28, 2012

Ham Pancakes

This is not really an appetizing title for this yummy breakfast treat. Of all the things about blogging, titling some of these recipes is the one thing I am willing to throw up my hands with and admit, "I just can't". I just don't know what else to call it. It tastes good, that's what matters, right?

Anyhoo.......

It's time for a confession. A bacon confession to be more precise, and it's not all that nice. You know how you see all these recipes nowadays for stuff like bacon cupcakes, bacon cookies, candies, ice cream, doughnuts, etc., etc... Any and all manner of  bacony confections you can think up, it seems to be out there. Here's my confession, none of these things sound good to me at all. Maybe somebody needs to convince me because I'll also admit I have not tried a single one of these things. I need to challenge my self to make a bacon cake or something, maybe then I won't be such a hater.

There is one place however where sugar and salt intersect that is as old as time and is, in this girl's opinion, the most delicious way it's done and that is on the breakfast plate.

~Syrup and bacon~

~Syrup and sausage~

~Syrup and ham~

(I will digress so far as to say that I am  intrigued by recipes I've seen for candied bacon.)

My mom used to make these pancakes every now and again when I was a little girl and I've been singing the praises of her "pancakes with cubed ham in the batter" to my husband for the majority of our 12 year marriage. But once again, the lazy breakfast line cook in me has never gotten around to making it for him.

Until today.

It was fun to put this together for the family this morning. And everyone raved about it.

Everyone, that is, except my youngest, who is still in the "none of my foods can ever be touching" phase. He got the deconstructed ham pancakes version of the recipe (pancakes with ham on the side).


Ham Pancakes
~servings vary~

Note* This is kinda more an idea, than a literal recipe.You can use your favorite pancake mix (my family's favorite is Snoqualamie Falls Lodge Old Fashioned Pancake and Waffle Mix. Not sure if it is widely available, it's made here in Seattle) or pancake recipe.

Ingredients: 
1. Your favorite pancake mix (or recipe), prepared according to package instructions
2. Ham, cut into 1/4 inch cubes (for my recipe this morning I used 3c. pancake mix (15-18 pancakes according to package) and a little over 1 c. diced ham)
3. Syrup and butter, whatever you like to put on your pancakes

Instructions: 
Make pancakes as you usually would. After pouring batter onto your hot griddle, sprinkle the diced ham on top of the uncooked pancake side (as little or as much as you like). Continue with the recipe as you would with regular pancakes.

Friday, April 27, 2012

Creamy Chicken Enchiladas

This recipe is an oldie. I started making it about 10 years ago when I was a new mom and still kinda a newly-wed. It was fun as a new cook to throw together these kind of simple recipes. I went through a long  phase where I was always on the lookout for a good casserole. Eventually as my cooking skills improved I made recipes like this less and less. Now I rarely make these kind of canned soup concoctions.  And I didn't make this recipe in particular for at least 4 or 5 years. But it's turned out to be a perennial favorite, for my oldest son in particular, who loves it!

Let's face it, this is grub food. It's not fancy, it's not complex (and it didn't photograph very well). But it's a great recipe that can be quickly put together that will fill up the hungry bellies in your family.


Creamy Chicken Enchiladas
~serves 6-8~

Note* This recipe calls for 4 cups of cooked chicken. I usually use 3 large chicken breasts (about 1 3/4 lb.), which I season with salt and pepper and then poach in about 2 cups of water in a large skillet (covered) for about 20 minutes over medium heat, turning once halfway through the cooking (first I bring the water and seasoned chicken to a simmer over medium high heat). You could also use leftover chicken from another recipe or even leftover turkey.

Ingredients: 
10 flour tortillas
4 c. coarsely chopped chicken 
1 can cream of chicken soup
1 (7 oz.) can chopped green chiles
4 oz. softened cream cheese
1/2 c. plus 1 c. sour cream
8 oz. (2 c.) package shredded mexican cheese blend 
Salsa, for serving (optional)

Instructions:
1. Move oven rack to the middle position and preheat oven to 350 degrees. Spray a 13x9 inch baking dish with cooking spray, set aside.

2. In a large bowl mix together soup, chiles (I don't bother draining the chiles), cream cheese and 1/2 c. sour cream. Mix in the chopped chicken. Using a half cup measure, portion out the filling between the tortillas. Roll up and place seam-side down in the baking dish.

3. In a medium bowl, mix together remaining 1 c. sour cream and the cheese. Evenly spread this over the enchiladas. Bake, uncovered 30-35 minutes, or until bubbly and slightly browned. Sometimes I will put the casserole under the broiler for a couple minutes to brown the top a little more. (Careful if using a pyrex pan under the broiler.)


Wednesday, April 25, 2012

Cuban Panini

Ok so.... I am posting another sandwich. I think ever since it hit me that April is National Grilled Cheese Month I have had hot and cheesy sandwiches on the brain. This time it's a cuban panini. I often say that my panini press is my favorite of all my non-essential cookware. I love how you can cram so much stuff into a roll, grill it in the panini press and it comes out all neat and compact, and the bread is nice and crispy. You can really put almost anything in a panini and it comes out alright. My hubby and I were just discussing what the weirdest thing we ever put in our panini, I think his putting leftover chicken teriyaki (leftover steamed broccoli included) might be the strangest one ever done in our house.

Anyway, I purposely picked up an extra-large roast the other day when I made pork roast so I could make these sandwiches. If you've never had a cuban sandwich before you should really give one a try.


Cuban Panini
~serves 4~

Note* You'll have to forgive me, I forgot to weigh the sliced pork so I could tell you how much you need for this recipe, but if I had to make a guess, I'd probably estimate 1/2 - 3/4 lb. leftover cooked pork should be enough.
Note** If you don't own a panini press, you can get a similar effect by grilling the sandwiches in a skillet with a tiny bit of oil or butter and placing a second skillet or a dutch oven on top of the sandwich to weigh it down as it cooks. 

Ingredients:
1/2 c. mayonnaise
2 T. yellow mustard
4 sub rolls, split in half
3 large pickles sliced, excess moisture blotted away with paper towel
leftover cooked pork, thinly sliced
4 slices of deli ham (I prefer black forest)
6 deli slices of swiss cheese

Instructions:
1. Mix together mayonnaise and mustard in a small bowl, set aside. Preheat your panini grill while assembling the sandwiches.

2. Spread about 1 T. mayo-mustard mixture on each half of the split rolls. Layer the pickles, roasted pork, ham and swiss cheese evenly between each roll. 

3. Grill each panini 5-7 miuntes until hot all the way through. Let sit for 2 or 3 minutes before serving.

Tuesday, April 24, 2012

Monte Cristo Sandwiches

When I was a kid there were two breakfast dishes that I almost always ordered whenever I went out to breakfast with my family. And those two dishes were 1. Eggs Benedict and 2. the Monte Cristo sandwich. Now I don't mean to toot my own horn or anything but I think those are pretty adventurous dishes for a child.

Needless to say, my love of food started early.

A Monte Cristo sandwich combines so many yummy flavors. It's a little bit french toast and a little bit grilled cheese and it is great for breakfast, lunch or dinner.

Usually, these sammies are either served with maple syrup or strawberry jam. I like to make mine just a little bit more on the savory side by mixing together strawberry jam with a little dijon mustard.


Monte Cristo Sandwiches
~makes 4 sandwiches~

Note*I toasted the bread before I made these sandwiches, in the hopes that it would prevent the bread from becoming soggy when dipped in the egg mixture. Because whole wheat bread is heartier than white bread I found this step unnecessary. If I were using white bread I probably would toast the bread beforehand.
  
Ingredients:
1/2 c. strawberry jam
2 T. dijon mustard
4 eggs, lightly beaten
2 T. milk
2 T. flour
salt
8 slices of bread (I used whole wheat here but white is more traditional, see note above)
8 thin deli slices of swiss cheese
4 thin slices of ham
4 thin slices of turkey
2 T. butter
powdered sugar (for serving)

Instructions:
1. For the sauce: Mix together the strawberry jam and dijon mustard in a small bowl and set aside.

2. Place the eggs in a wide, shallow dish. Whisk together the milk and flour, then add to the eggs along with a pinch of salt. Mix together thoroughly.

3. Spread each slice of bread with about a teaspoon of the strawberry-mustard sauce. Divide the cheese and meat evenly between each sandwich beginning and ending with a slice of cheese.

4. Melt 1 T. butter in a large nonstick skillet over medium heat. Working with one sandwich at a time, dip both sides in the egg mixture. When the butter is foaming, add the sandwich and immediately dip another sandwich in the egg mixture and place in the pan with the first sandwich. Cook each sandwich until golden brown, about 3-4 minutes per side.

5. Wipe out the skillet using paper towel. Repeat step 4 with the remaining sandwiches and 1 T. butter.

6. Serve with powdered sugar and remaining sauce.

Monday, April 23, 2012

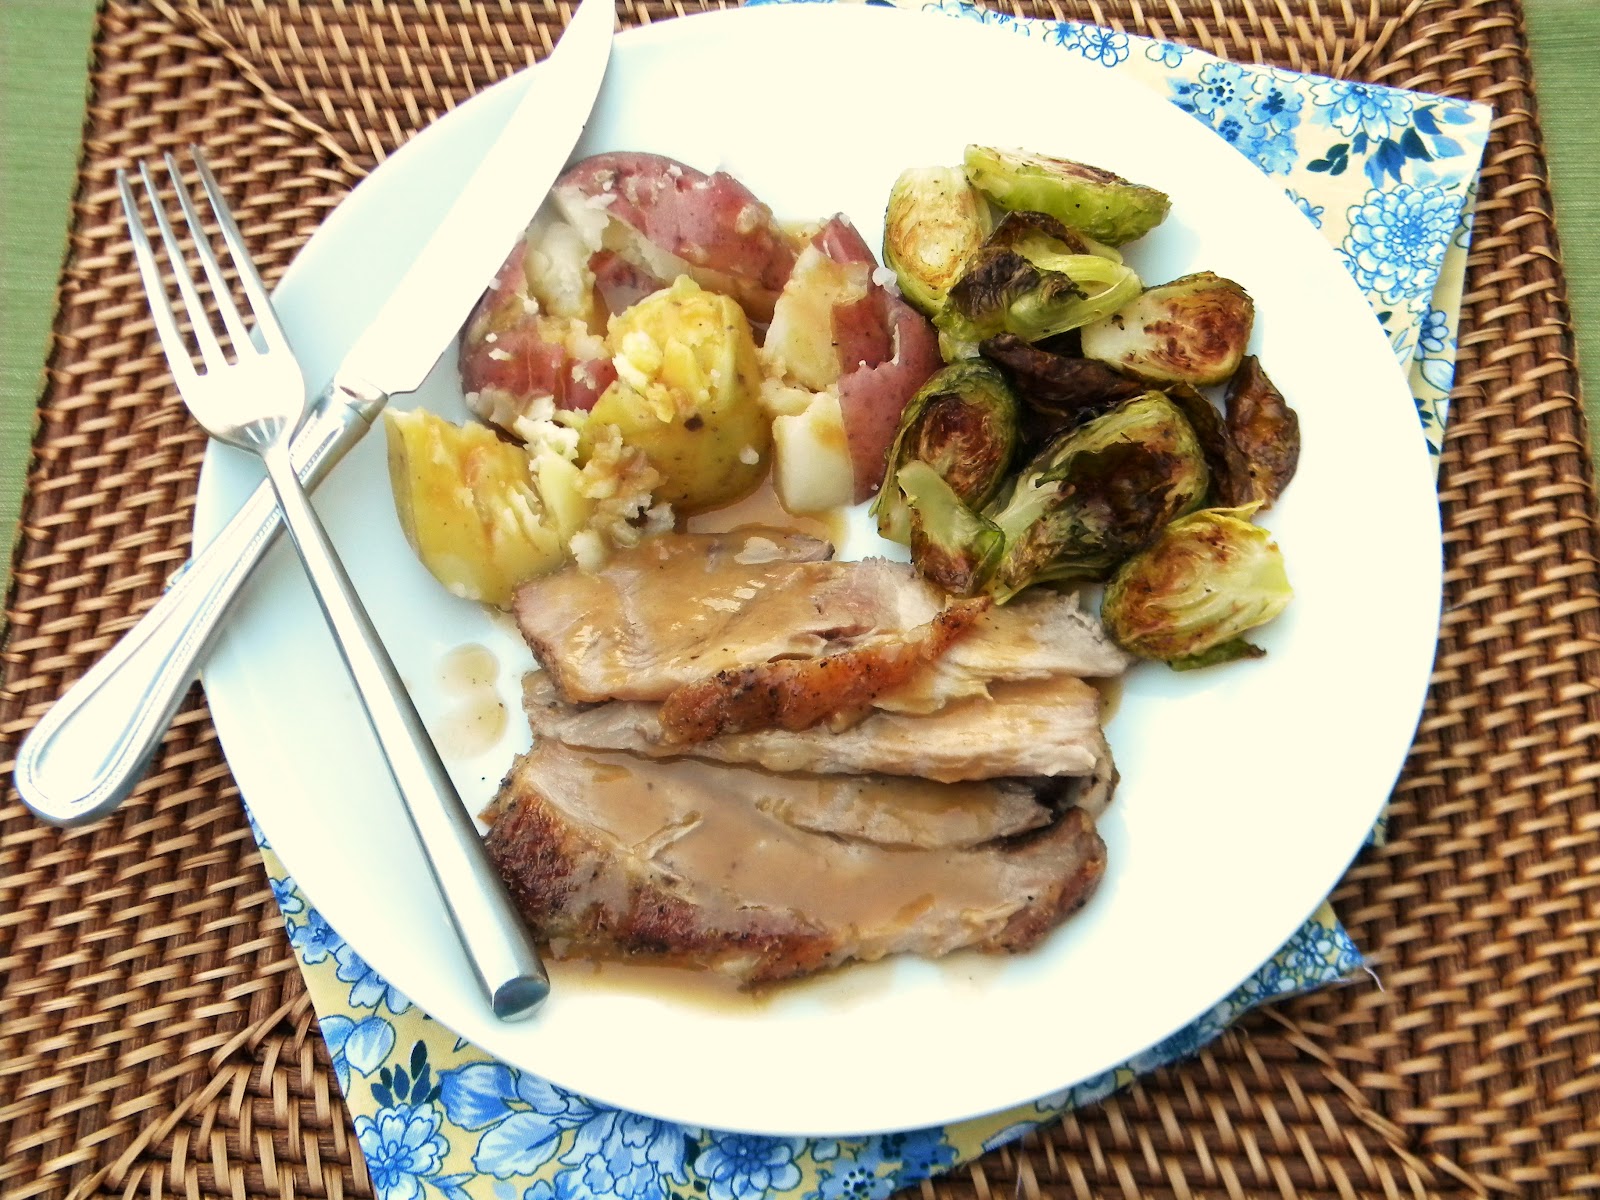
Old Fashioned Pork Roast and Gravy ~ My Mama's Recipe

I am so excited about this post because not only am I posting another one of my Mom's great recipes, she was actually in the kitchen to share in the experience of cooking it with me.

My mom was such a great cook that when I was growing up, all our friends from the neighborhood would clamor at the opportunity to eat dinner at our house. It was great and let me tell you, my mom earned a certain level of respect from the neighborhood kids, especially from all my brother's friends, that lent credulity to the old saying that "the way to a man's heart is through his stomach". I learned from a young age, that statement is most definitely true.

I have cooked all sorts of ways through the years and I even had times of rebellion against my mom's cooking. Believing that my mom's cooking was overly-simplistic and therefor a more fussy and complicated recipe, with a longer ingredient list must be the superior one. And as I've grown older (and hopefully wiser), I know that this just isn't always the truth.  Plus I think that anybody who was lucky enough to have mother who could cook knows, there are just certain dishes that no other recipe can hold a candle to the way that Mom made it.

I love this particular recipe because not only is it delicious, it's extremely affordable (I paid only $1.49 a pound for this roast), and it's the kind of "Sunday dinner" style comforting fare that is worthy of even a holiday meal (I have served this as Easter dinner). Also it makes great leftovers (especially sandwiches).

I was glad, in particular to have my mom in the kitchen with me on this one because she was there to coach me on the gravy. When I was growing up my Mom always made gravy using water. For some reason, I cannot help myself wanting to use canned chicken broth when I am making gravy. I don't always love it, but I just can't help it for some reason, I am afraid there won't be enough flavor even though I know my Mom's method works.... So glad I did it her way, it is the best.

As I get older, I cherish the opportunity to learn all I can about the food I grew up with.


Old Fashioned Pork Roast and Gravy ~ My Mama's Recipe

Note* You can use any pork roast you want for this recipe. I prefer to use a more inexpensive cut of pork (I used pork shoulder here). It is good if the roast has at least a thin layer of fat on top so you will be sure to get enough drippings to make the gravy. I used a pretty large roast here (6 1/2 lbs.) because I wanted to have leftovers to use in other dishes but you could go as small as 3 lb. and use the same method, the cooking time will just vary.
**I like to serve this with boiled potatoes and either steamed green beans or roasted brussel sprouts, like I did here. I made the brussel sprouts by taking halved, trimmed brussel sprouts, tossed in olive oil, salt and pepper. Spread them out on a baking sheet and roast at 375 degrees until browned and tender, about 30 minutes.

Ingredients:
Pork Roast (see note above)
garlic powder
salt and pepper
4 T. flour
2 c. water

Instructions:
1. With the oven rack in the middle position, preheat oven to 325 degrees. Pat pork roast dry with paper towel and sprinkle liberally with garlic powder, salt and pepper. Place in a 13x9 inch baking dish (or you could us a roasting pan).

2. Roast pork until the internal temperature registers 145 degrees, when checked with a thermometer in several places (for my 6 1/2 lb. roast, this took around 3 hours). Transfer the roast to a serving platter and cover loosely with foil, set aside while making the gravy.

3. To make the gravy: Add the water to the baking dish, being sure to scrape the browned bits form the bottom of the pan. Remove the liquid to a fat separator. Separate the fat from the liquid. Alternately, if you don't have a fat separator you can poor the fat out of the pan first then poor the water into the pan and scrape up the bits.

4. In a medium saucepan add 4 T. fat and whisk in the flour. Cook over medium heat for a couple minutes to cook out the raw flour flavor. Slowly whisk in the liquid and bring to a boil, stirring constantly. Boil for 1 minute to thicken. Season with salt and pepper if needed.